详细说明
智能手机普遍内置的光线传感器,在一些笔记本电脑上却并没有配备。当你带着这样的笔记本电脑在某些环境下工作时,如何让笔记本随着环境光线来自动调节屏幕的亮度呢?
下面我们准备用一个 Arduino 外加两枚光敏电阻来搞定这件事~
通过这个小项目你可以学到如何让 Arduino 和电脑通过串口进行通信,以及光敏电阻的使用方法。
链接表
文件库
pc-brightness-controller-main.zip
[14742 Bytes at 2021-07-27, 54 次下载]
教程
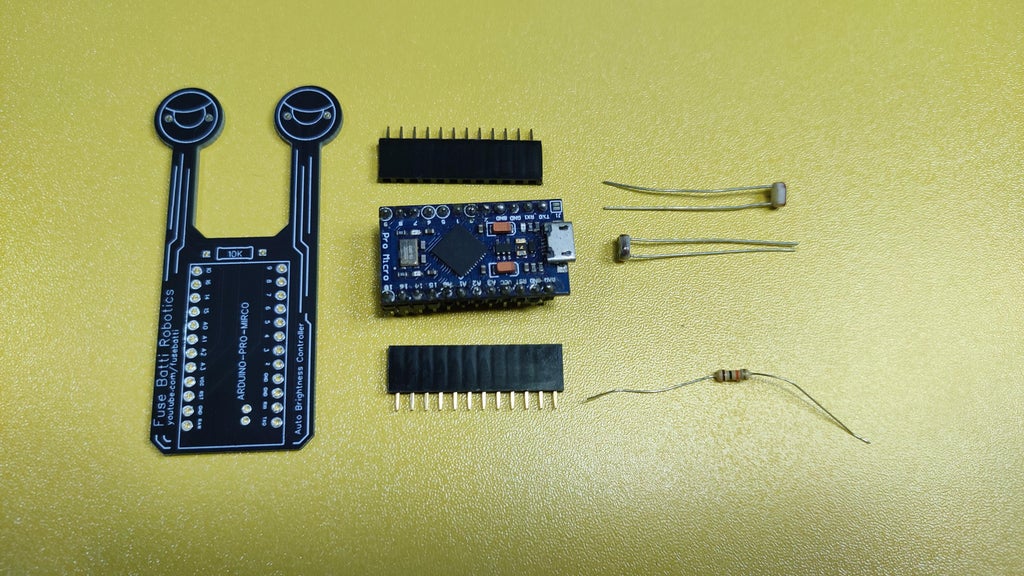
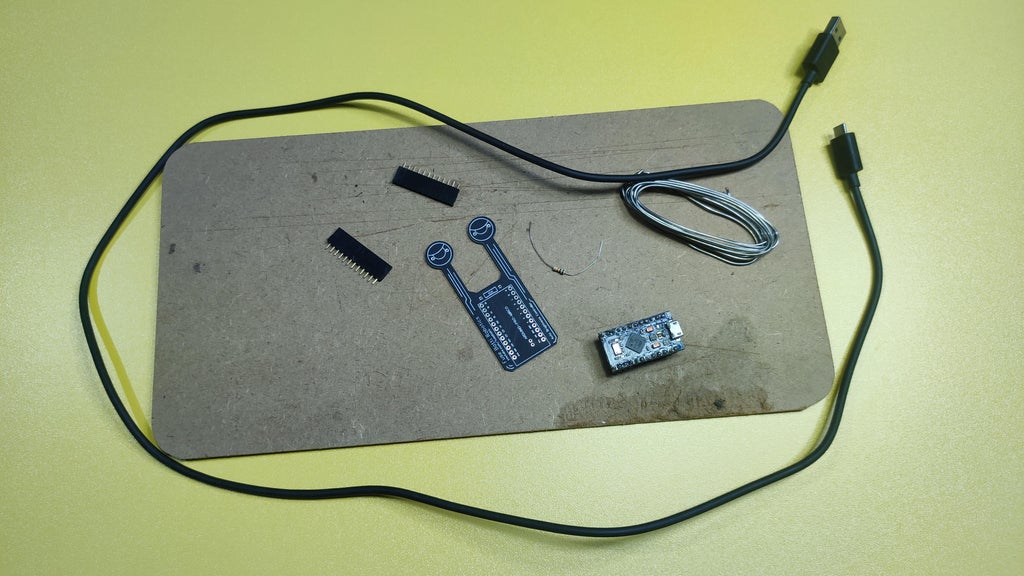
组件清单
- Arduino 开发板(这里使用 Pro mini) × 1
- LDR 光敏电阻 × 2
- 10kr 电阻 × 1
- 电路板 × 1
- 排针座 × 2
- USB 线(兼容 Arduino 开发板) × 1
原理说明
当我们需要检测环境光线的时候,使用光敏电阻是最简单的方案。就像智能手机的光线传感器一样,将 LDR 光敏电阻朝向人的正脸并获取光线强度模拟信号。由 Arduino 的 ADC 引脚读取这个数值,值域为 0 ~ 1024。
我们通过电脑上的 Python 程序,来接收由 Arduino 发送过来的光线数值,并将该数值与屏幕亮度的级别做一个映射,然后来调节屏幕的亮度。
搭建实验电路
为了验证这个想法,首先在面包板上搭建实验电路。原理图如下。
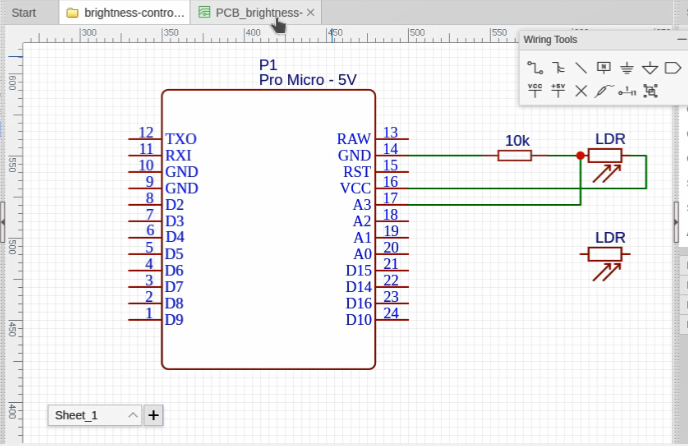

并编写一段简单的程序,通过 Arduino 的串行监视器输出光线传感器数据。
// define sensor pin
int sensor_pin = A3;

void setup() {
  // set things here
  Serial.begin(9600);  // init serial communication at 9600 bps
}

void loop() {
  // mainloop
  int sensorValue = analogRead(sensor_pin); // read the input on analog pin A3:
  Serial.println(sensorValue);              // send data over serial

  delay(200);                               // a little delay to make things work better
}
完整的代码在项目文件库中可以下载:
https://make.quwj.com/project/389
运行之后可以看到在不同的光线强度下,输出的数值在 0 ~ 950 这个区间。
设计 PCB
使用 easyEDA 设计出 PCB。我选用了两枚传感器,这样让这个小设备如图一直蜗牛,更加可爱。实际上左边的 LDR 光敏电阻并未使用。

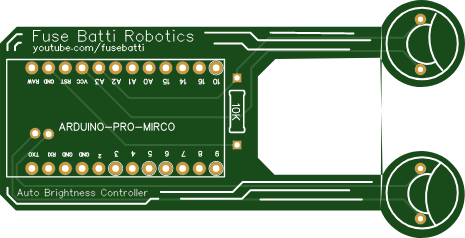
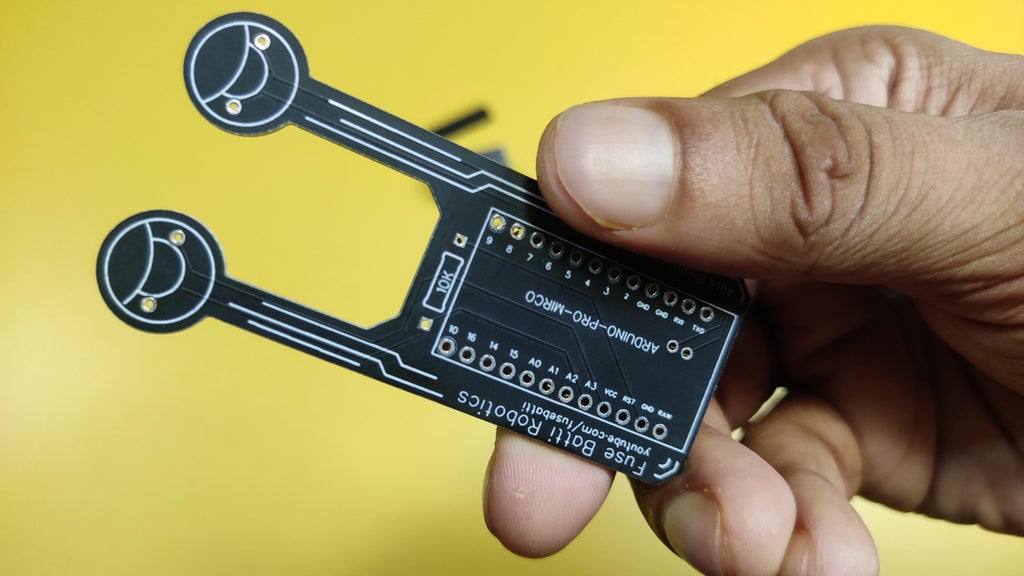
然后就交给 PCB 板厂打样吧。
焊接并完成组装
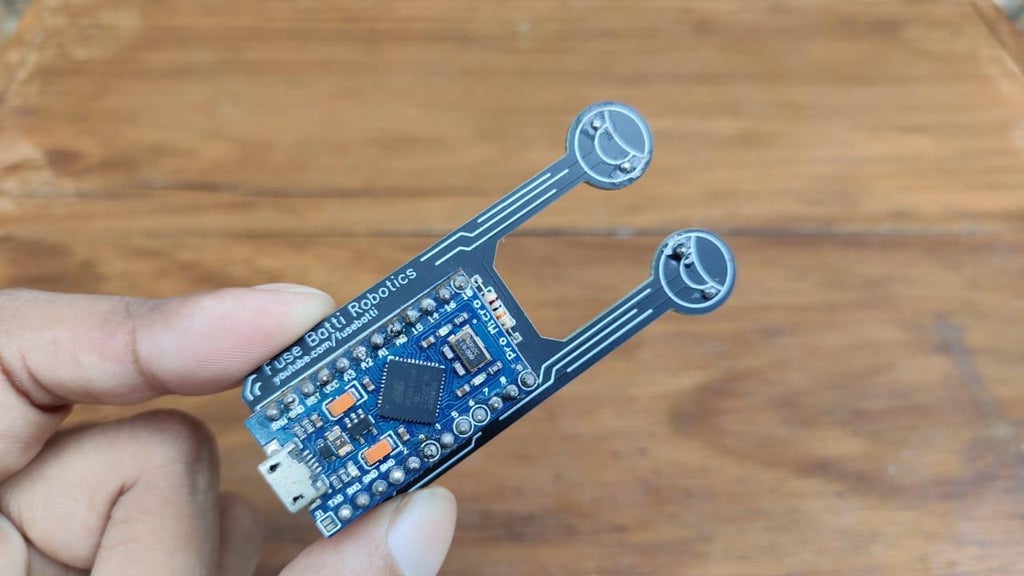
这块板很简单,没有太多的组件。焊接好一组排针座和光敏电阻就好了。
然后把 Arduino 插进排针座。
Arduino 编程
将 Arduino 用 USB 线连接到电脑,打开 Arduino IDE 将下面的代码上传到 Arduino 上。
/*  Computer Hack!
    Brightness Controller

    (C) License: GPL3-General Public License

    author: ashraf minhaj
*/

// define sensor pin
int sensor_pin = A3;

void setup() {
  // set things here
  Serial.begin(9600);  // init serial communication at 9600 bps
}

void loop() {
  // mainloop
  int sensorValue = analogRead(sensor_pin); // read the input on analog pin A3:
  Serial.println(sensorValue);              // send data over serial

  delay(200);                               // a little delay to make things work better
}
安装 Python 程序
通过上面的步骤,Arduino 已经可以将光线数值通过串口传给计算机了。下面要做的是编写一个 Python 程序,在计算机上运行,任务是接收发来的传感器数值并依此调节屏幕亮度。
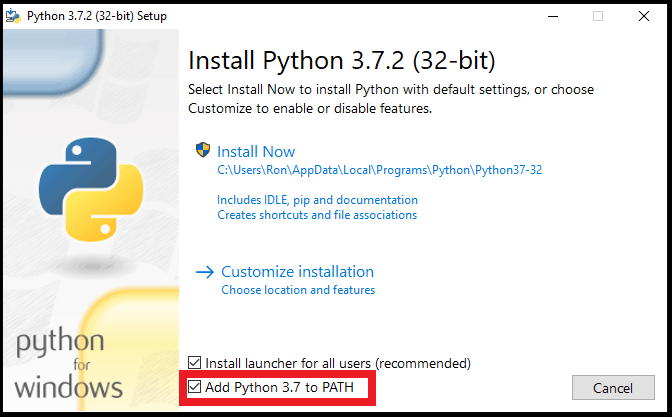
如果你的计算机上还没装过 Python 环境,请在这里下载好 Python 并完成安装:
http://python.org/download
打开终端,安装两个库,分别用于串口和屏幕亮度控制方面的支持。
$ pip install pyserial
$ pip install screen-brightness-control
在项目文件库中下载源码:
https://make.quwj.com/project/389
找到 controller.py,其程序如下:
""" Computer Hack!
    Brightness Controller

    (C) License: GPL3-General Public License

    author: ashraf minhaj
"""

""" libraries -
$ pip install pyserial
$ pip install screen-brightness-control
"""

# import necessary libraries
import serial                                     # for serial communication
import serial.tools.list_ports                    # to get Arduino port automatically
import screen_brightness_control as brightness    # to control brightness

# device buadrate (bit per second)
# (change buadrate according to your need)
BUAD_RATE = 9600                                  # Pro Micro's buad rate is 9600
PORT      = ""

# get sender device port automatically
serial_ports = list(serial.tools.list_ports.comports())  # get list of ports
for s_port in serial_ports:                              # iterate through all ports
    if 'Arduino Micro' in s_port.description:            # look for Pro Micro board
        PORT = str(s_port[0])                            # select first found board and
        break                                            # proceed

# connect with sender device
sender = serial.Serial(PORT, BUAD_RATE)

def map_value(value, in_min=0, in_max=1024, out_min=0, out_max=100):
    """ To map values. Arduio sends values from 0 to 1024. My goal
    is to make them in between 0 to 100."""
    return int((value - in_min) * (out_max - out_min) / (in_max - in_min) + out_min)

# mainloop
while 1:
    # convert byte data into string then integer
    sensor_value = int(sender.readline().decode("utf-8"))  # get data
    final_value = map_value(value=sensor_value)            # map value (brightness in percentage)
    #print(sensor_value)
    print(final_value)
    brightness.set_brightness(final_value)                 # set brightness

# close port properly so that others can use it
sender.close()
运行它,同时确保 Arduino 也连接在计算机上。
现在就可以实现视频中的效果了!
