

Introduction: Deej - a Physical Volume Mixer
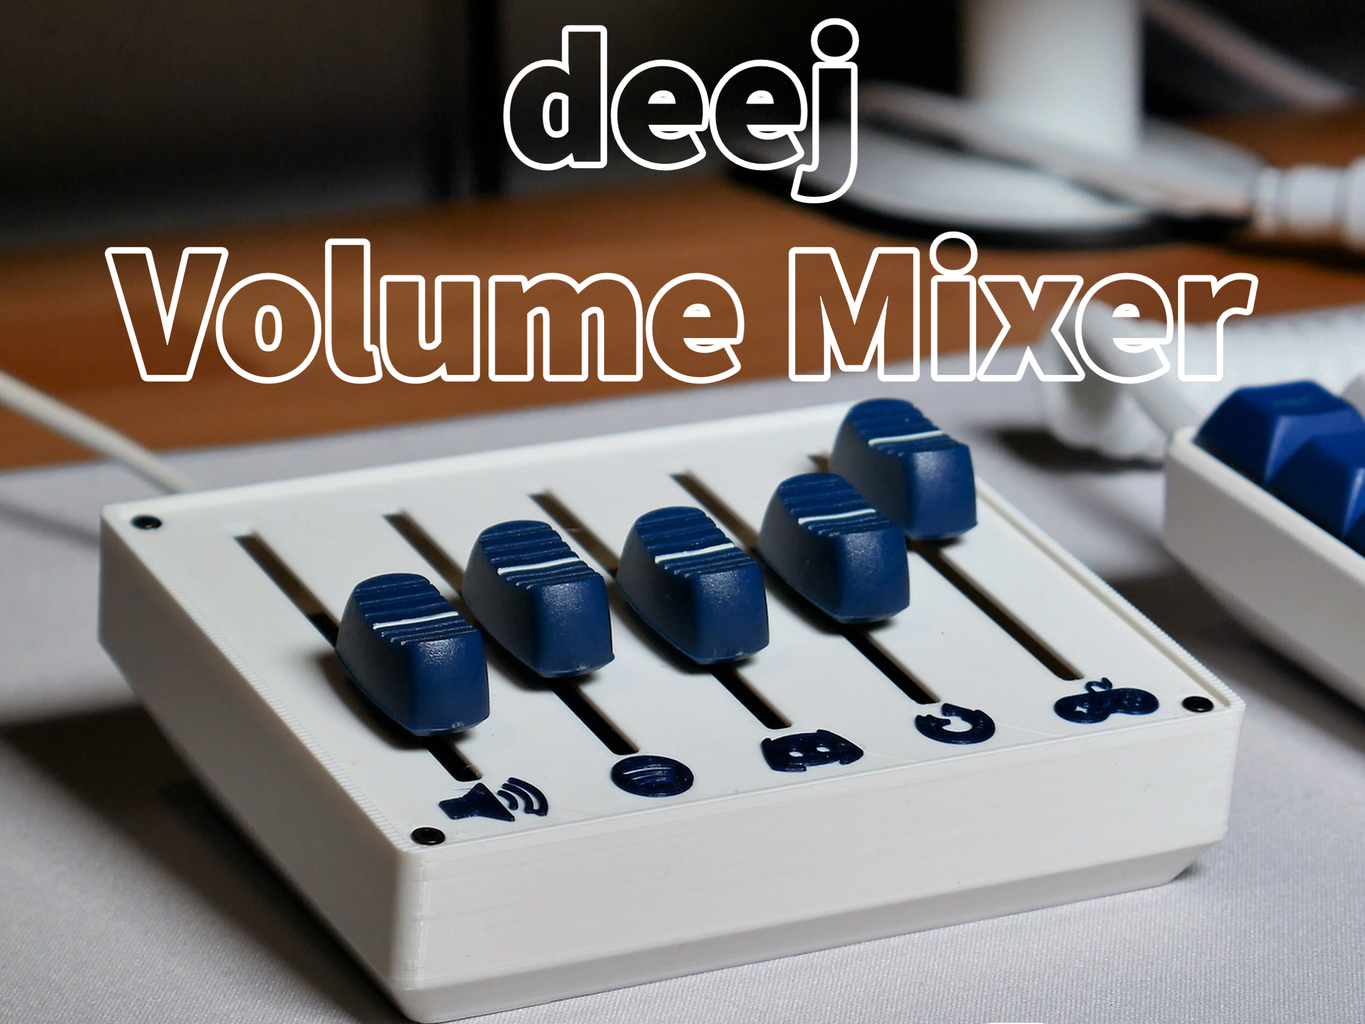


Meet deej!
deej is a physical volume mixer. Just like the volume mixer built into windows, just physical! This means that you can change the volume of an application without closing your important game. You can turn the game volume down and Discord volume up, when someone joins the call, and turn the Spotify volume up when your beat comes on. Since it sits right beside your keyboard you can quickly change volume, for example if a game has a loud intro music (looking at you Civ 6).
Let's get started!
UPDATE: You can now get all the electronics in a kit! Click here to see
We are also planning to release this as a product in collab with DotMatrixLabs.
Step 1: Watch the Video!
I made a video showing the build process, give it a watch!
Step 2: Ordering Parts
You can get the full kit from my site, Ananords.com!
The parts I used are linked below:
Slide Potentiometers: (AliExpress or Amazon)
Knobs: (AliExpress or Amazon)
Arduino Nano: (AliExpress or Amazon)
Male header pins 2.54mm : (AliExpress or Amazon)
M3 x 5mm Round Head (AliExpress or Amazon)
M2 x 4mm Countersunk (AliExpress or Amazon)
Custom PCB (see next step or order above)
Step 3: PCB - Schematic


I used EASYEDA to design the PCB's.
You can get the EASYEDA file to the PCB V2 here
I ordered my PCB's from JLCPCB. You can get 5 pcs for only 2$!
You can also try to make one with protoboards. You might have to change the CAD model a bit though...
Step 4: Start Printing!


The "first" step is to print the base and plate.
I printed the base and top plate in white PLA, and for the blue icons, I used Blitz Sapphire by AddNorth.
Both are printed with .15 layer height, and 20% infill.
Link to the 3D files:
STL:
FUSION 360:
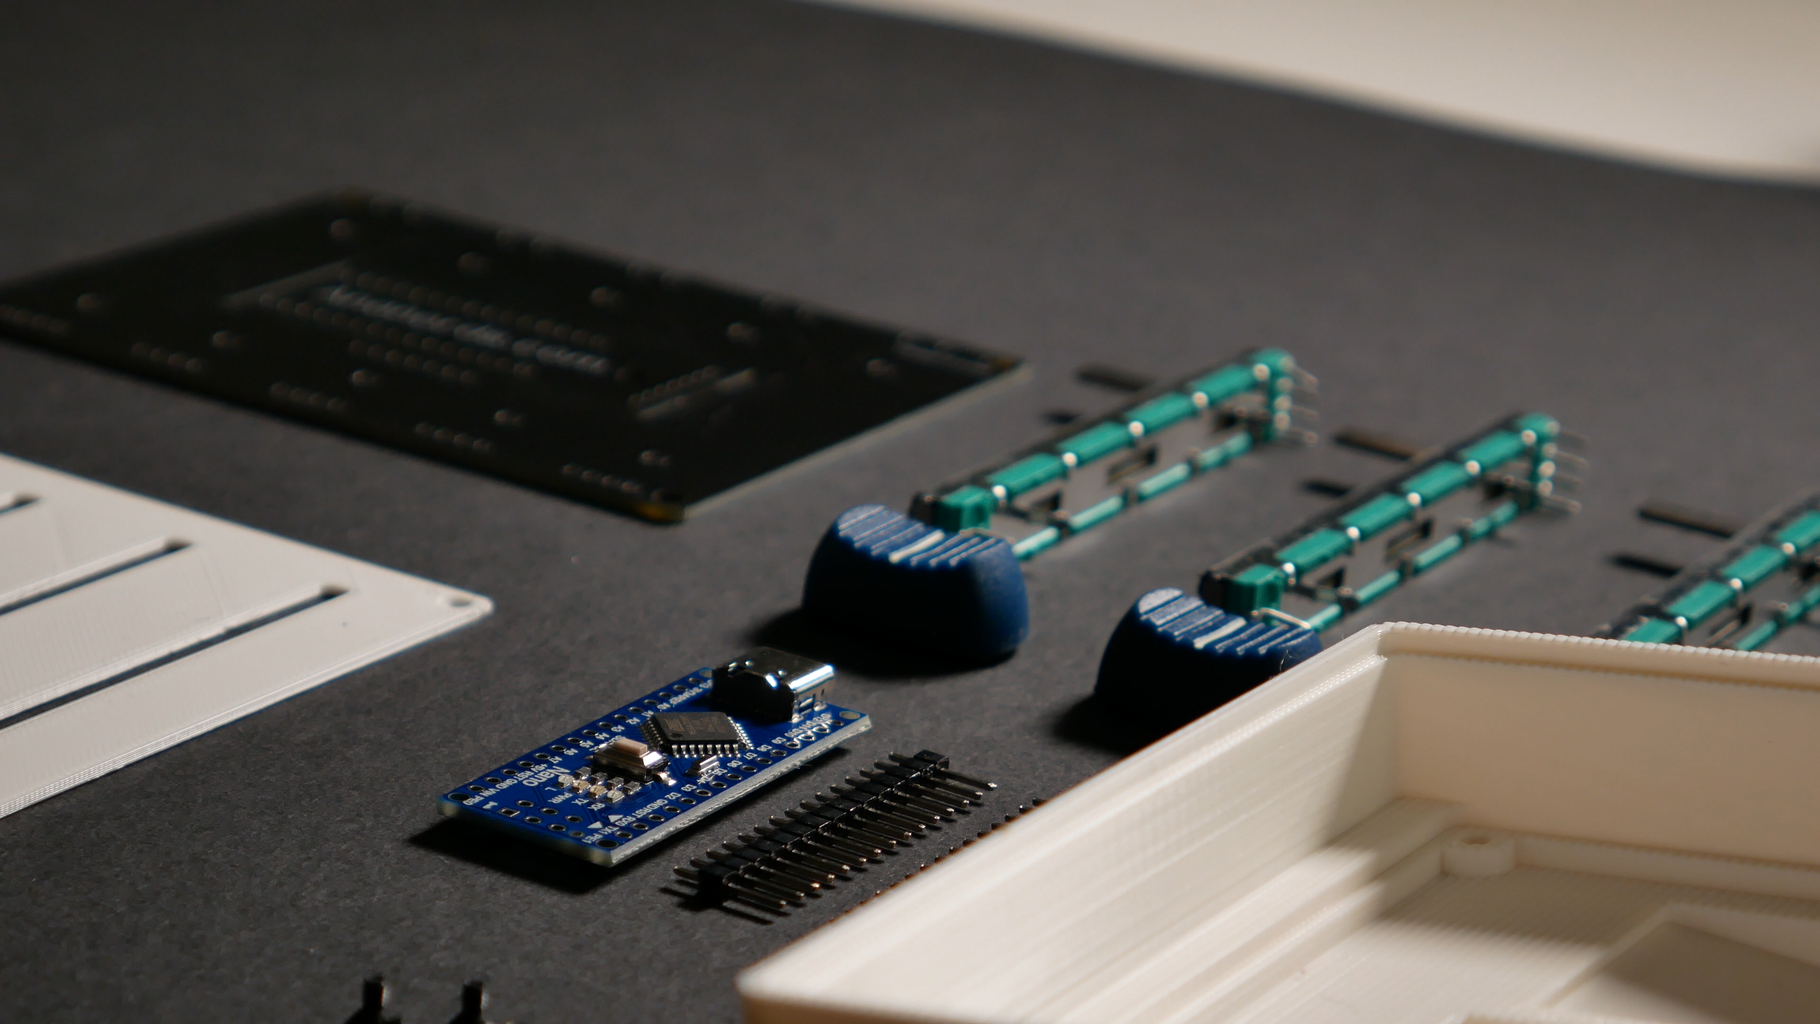
Step 5: Solder the Arduino Board


While printing, you can start assembling and soldering the electronics!
You first need to solder pins to the Arduino, if yours doesn't already have them.
Then, you can break off the middle piece of the PCB (the Arduino daughter board). To do this, simply press in the middle PCB until the mouse bites breaks, and the PCB becomes loose.
Now you can solder the Arduino to that board.
The Arduino PCB also needs some pins to connect to the potentiometer board. You can use some wires, or a 6 pin 2.54 mm male header.
Do not solder the Arduino PCB to the Potentiometer board, or the potentiometers yet!
Step 6: Assembling the PCB's


If the 3D prints are not done yet, you can do steps 8 and 10 before this:)
You first need to insert the Arduino board into the base.
Then, carefully insert the potentiometer PCB into the base, and carefully line up the pins from the Arduino PCB with the holes on the potentiometer PCB. Make sure it is fully mounted.
Now, solder the pins to connect both boards together. When you have done that, you can slowly remove both cards from the base.
Cut the pins of the "bridge" between the Arduino PCB and the Slider PCB as short as possible!
Use a piece of tape over the pins, to remove the risk of the slider shorting the pins.
Step 7: Solder the Potentiometers


ONLY FOR V2:
In the V2 I have added 2 more screws to better secure the Arduino PCB to the case.
Insert all the potentiometers into the PCB, and solder them.
Update: Use the 3D printed spacers to lift the potentiometers away from the board, to remove the risk of the potentiometers accidentally shorting the pins of the bridge between the Arduino PCB and the Slider PCB.
Use two spacers per Slider, one on each side. Place them beside the "Large" pins. (See picture)
Make sure that all the potentiometer pins are going through the correct holes, and that they are fully inserted before soldering!
You can now insert the two PCBs back into the base.
I found that using a screwdriver to push the Arduino PCB in place helped a bit.
Use the four M3 screws to secure the Potentiometer PCB.
Step 8: Upload the Code


The original deej project includes a software, how to set that up and use it can be found here: GitHub
Dot X is a software developed by DotMatrixLabs. It is a third party software that is originally made to their mixers, but has deej hardware support when flashed with a custom firmware. Guide on that below:)
Download Dot X
Download your copy of Dot X here
It only support Windows at the moment. Support for other operating systems will come in the future.
Setting up deej for Dot X
Follow the steps below to make your deej compatible with Dot X and start customizing your experience through the application!
Please note that currently Dot X only supports deej with 5 sliders, like the one in this instructables.
1. Visit the DML MCU flasher
- Navigate to DML MCU Flasher
- Click the flash button on the page.
- Choose the com port of the device. If unsure, look in device manager for CH340
- Wait for flashing to complete! If you have any problems, please report them in our Discord :)
2. Open Dot X and select your deej device
Open Dot X, press the cog in the top right corner. Under device, find your device in the drop-down menu and select it.
Tip!
While you are in settings, turn on autostart under general to make it start automatically when turning on your computer
And that's it! Now you can choose your applications by clicking the plus buttons on the main page:)
You can also use deej with the deej software by Omri Harel, you can find that one here. If you use Dot X, then there is no need:)
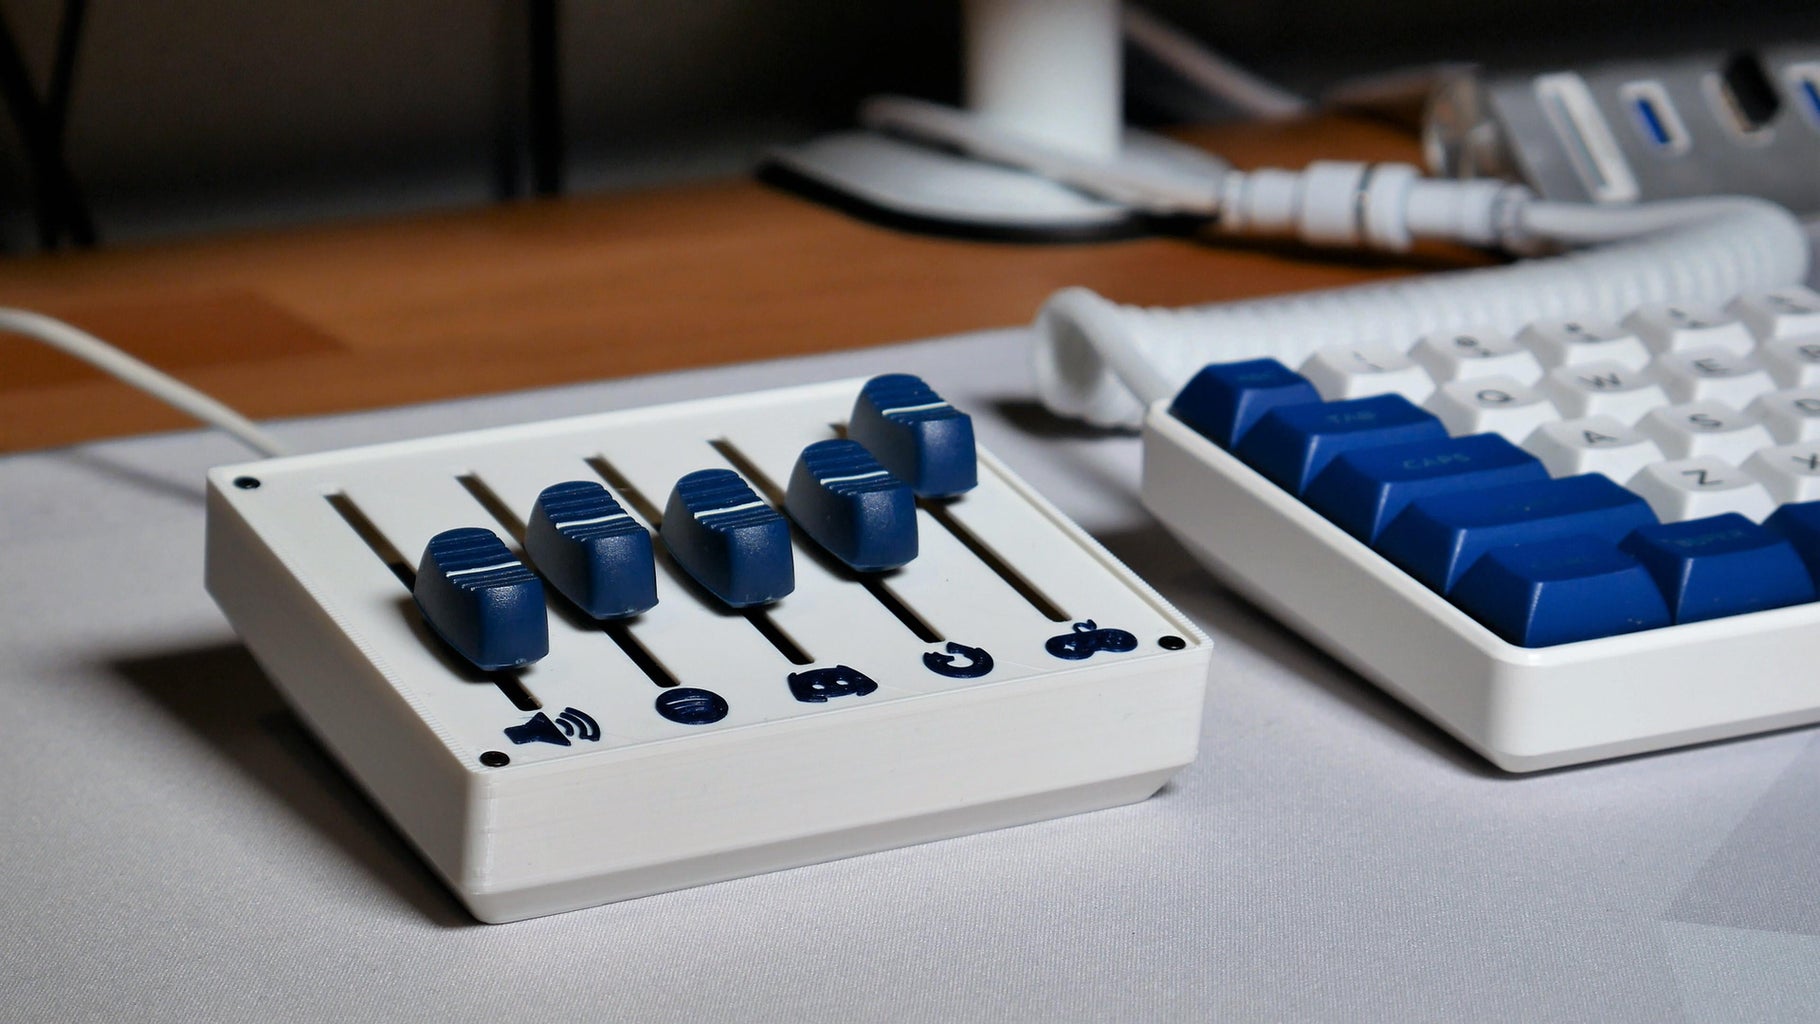
Step 9: Final Assembly


Now that you know everything works, you can assemble it together!
Take the top plate, and place it on top.
Then, take your four M2 screws and screw them in to mount the top plate.
The knobs should be easy to install, by just pressing them onto the sliders.
I also recommend gluing some rubber feet underneath to stop it from sliding.
Step 10: Done!
You have now created your own physical volume slider!
Hope you like the tutorial:)
Any questions?
Ask in the Discord Channel, or send me a message:)
Follow me on Instagram for updates on upcoming projects:)
Instagram: https://www.instagram.com/ananordss/
Join my Discord channel: https://discord.gg/2ESzkpG4ES
Contact me: Andreas@ananords.com
••• Support me •••
Patreon: https://www.patreon.com/ananords
Donations: https://ananords.com/products/donation/
Buy me a coffee: https://ananords.com/products/donation/
Runner Up in the
Arduino Contest


